Mistakes Happen
Today has been a rollercoaster already.
It started with some impatient customers and frustrations online. I decided I was probably not awake enough for all that and should just crochet instead.
As I began digging in my pile of yarn and wips (works-in-progress) I came across my March Cat square. I finished it ahead of schedule a few days ago but didn’t yet take photos so I pulled it out to take some pictures.
I found a mistake instead.
This should not have poky black lines on the cat’s back; I obviously miscounted the empty spots when crocheting. I tend to do that when there are a lot of squares not locked together. I usually notice before finishing the entire square. Oops!
I’ve now uploaded a video going over this process as well!
Mistakes in Interlocking Crochet
I sighed and pulled out my needle, scissors, crochet hook, and extra yarn. I debated on making a video to show you the process but my kids were not ready to be quiet enough for a video and I didn’t want to put off fixing this.
After fixing it (tails weaved in and everything!) I shared the photos to a friend who pointed out that I actually fixed it wrong. Oh, me. So I cut that off and fixed it again.
Big Tip
My number one tip for fixing a stitch in your interlocking crochet project: make sure you are fixing the right stitch!!
I hope this little photo tutorial on how I fix a stitch can help you.
Two Ways to Fix It
There are two problems that can arise. Either you need to cover a dc with the other color or you need to cover a chain space with the other color.
Lucky me, I had to do both in this one.
1: New Chain Space
I start by inserting my hook into the top of the dc before the stitch I need to re-create.
This black double crochet should be covered with a purple-pink chain space instead.

I pull a loop up and chain twice, then cut it off.
Scissors are pointing at the black dc that needs to be hidden behind a pink chain space.

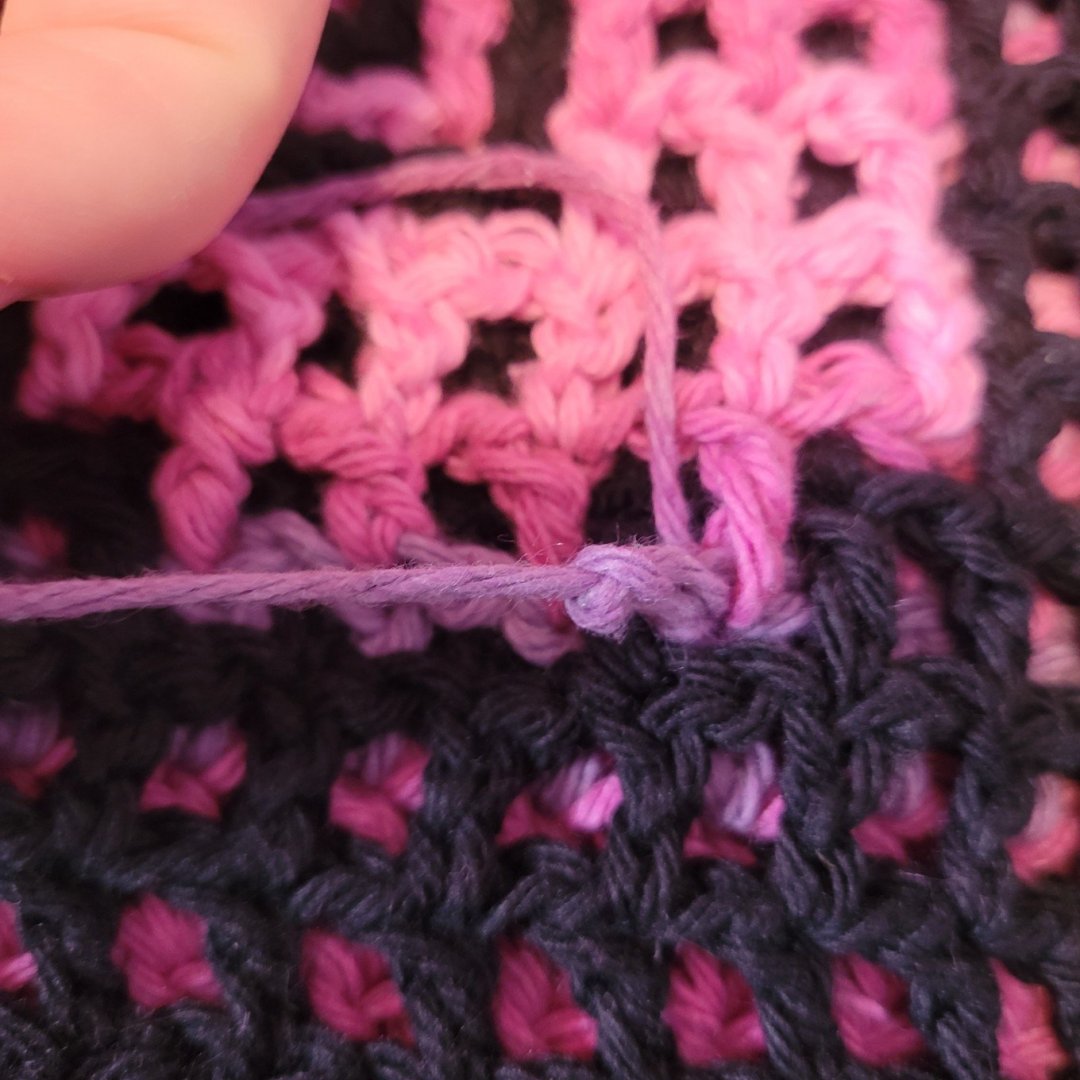
The new chain covers the black dc.
The knotted end needs to be sewn/woven into the top of the next dc. I use a needle for this. When weaving tails in you want to try going through the fibres of the yarn and not just around the stitches which is why a needle is better than a crochet hook.
The tail at the beginning that has not been knotted anywhere also needs to be firmly woven into the project.

2: Creating a New Double Crochet
I think creating a chain is slightly easier than a new dc, but the process is very similar.
Technically, I needed to create a black dc but my photos are of me creating a pink one because I messed up my fixing up. I cut it out and redid it with black but I hope these images are still helpful in seeing the process.
Image shows the needle across the black chain space I am about to cover with a pink dc.

First pull up a loop around the base of the dc ABOVE the dc you need to change.
Scissors are pointing to where you will work the double crochet into. Hook is about to pull a loop up around the base of the dc one row above the mistake.

Yarn over and insert hook just below the mistake (where the scissors are pointing in the images above and below).
Scissors are still pointing to the same spot as the previous image; new double crochet stitch has been made.

Finish your double crochet like normal. Chain, cut the yarn and pull the knot through. This tail needs to be sewn and woven in and the beginning tail needs to be securely woven in as well.
Ta-da! No more weird lines, just smooth boxes. My little girl smooshed it but you can still see the spot just below the heart above the cat’s back where I fixed it (in fact, you can’t really tell I did it)!

Take Note!
Creating a duplicate double crochet or chain stitch on the right side of your work does not change the wrong side of your project. If you want the other side to look different you’ll have to add more stitches on that side too.
And if you haven’t yet tried interlocking crochet (also called Locked Filet Mesh, among other things) you should check out my YouTube tutorials!
I have also added this post to my list of tutorials: ashleeslint.com/tutorials


